Installation
Once Seismic Grids is installed into QGIS, it can be accessed and run anytime you open a new project. Steps on how to install it:
Download the ZIP file ‘seismicgrids.zip’ from SharePoint.
Open QGIS. The minimum required version is QGIS 3.0.
On the upper menu go to ‘Plugins’ → ‘Manage and Install Plugins’

Figure: Screenshot of QGIS’ upper menu.
On the left menu of the opened window go to ‘Install from ZIP’
Search in your computer for seismicgrids.zip → Select and ‘Open’ → ‘Install Plugin’

Figure: Screenshot of QGIS’ Plugins window.
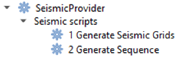
You should now see the ‘SeismicProvider’ inside the Processing Toolbox.
Optional: on the left menu of ‘Manage and Install Plugins…’ go to ‘Installed’ and check for Seismic Grids.
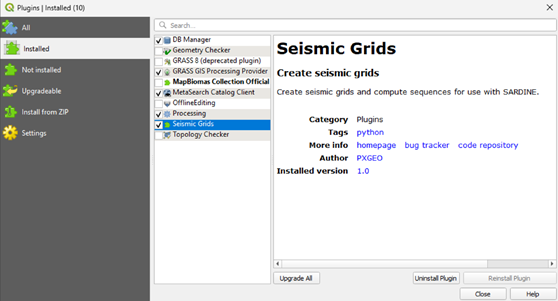
Figure: Screenshot of Seismic Grids overview in QGIS’ Plugins window.
Requirements
No needs passed the filters